Elevate Your Holiday Decor with a Christmas Santa Sleigh 3D Light Box
The holiday season often brings a rush to decorate, leading many to rely on mass-produced items that lack soul or durability. However, there is a growing movement toward creating meaningful, lasting decor that tells a story. A Christmas Santa Sleigh 3D Light Box represents the perfect intersection of modern crafting technology and timeless tradition. Unlike some traditional holiday decorations that may need to be replaced after a single season due to wear or changing trends, a well-constructed shadow box can be enjoyed and displayed year after year. By investing time and effort in creating a durable and timeless piece, you establish a cherished Christmas decoration that becomes an integral part of your family's holiday traditions.
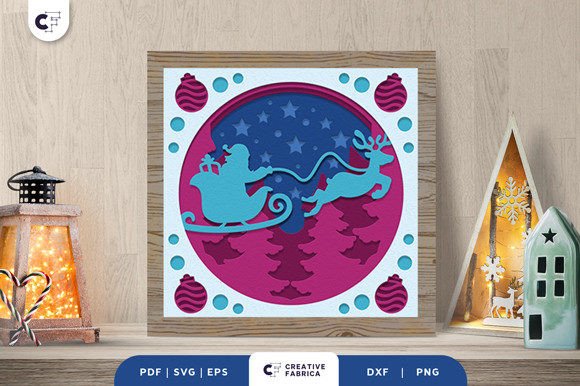
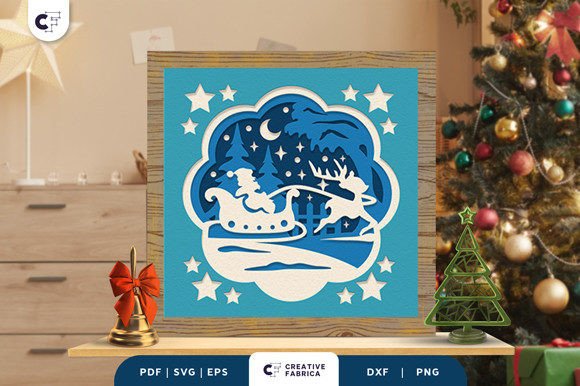
This project is more than just assembling parts; it is an exercise in creative expression. When you take a design like the Christmas Adventure 3D SVG and transform it into a physical shadow box, you gain the advantage of owning something unique. You can showcase a joyful Christmas scene where reindeer appear to pull Santa's sleigh through a starry night, all captured within a framed depth that flat ornaments simply cannot achieve. Whether you are a hobbyist looking for a weekend project, a small business owner seeking unique inventory, or a parent wanting to create memories with children, understanding the nuances of this craft is essential for success.
Avoiding Common Pitfalls in 3D Shadow Box Creation
While the concept of layering paper to create depth seems straightforward, several common mistakes can undermine the final quality of your Christmas Santa Sleigh 3D Light Box. One frequent oversight occurs during the material selection phase. Many beginners assume that any cardstock will suffice, only to find that lighter weights bow under the tension of adhesive or fail to hold the crisp edges required for a professional look. If the paper is too thin, the 3D effect diminishes because the layers collapse slightly, ruining the illusion of depth. Conversely, using paper that is too heavy can make cutting intricate details difficult, especially on standard home cutting machines.
To avoid this, always check the recommended weight for your specific cutting machine, typically ranging between 65lb and 80lb cardstock for optimal rigidity and cutability. Another significant error involves the spacing between layers. Enthusiasts sometimes apply glue directly between sheets to save time or money on supplies. This approach flattens the design, eliminating the very 3D aesthetic you are trying to achieve. The result is a project that looks muddy and lacks the dramatic shadows that define a high-quality light box. Furthermore, neglecting to plan the lighting element beforehand can lead to a dark, unimpressive display. A shadow box designed for backlighting needs translucent paper in specific areas or strategic cutouts to allow light to permeate the scene effectively.
Mastering the Assembly Process
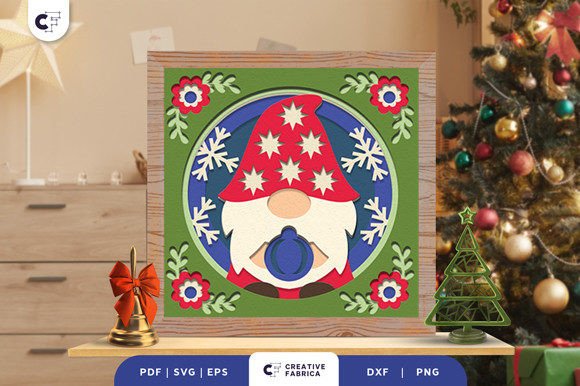
Creating a unique holiday decoration requires patience and precision. To ensure your project stands out, follow a structured approach that prioritizes longevity and visual impact. Start by selecting a high-quality digital file. The design fits perfectly in a standard shadow box frame, usually measuring around 20.32×20.32 cm (8x8 inches), but verifying your frame dimensions before cutting is crucial. Once you have your files—available in formats such as SVG, PDF, EPS, PNG, and DXF—import them into your design software.
Create a unique holiday decoration by following these refined steps:
- Prepare Your Machine: Whether you use a Silhouette or Cricut, ensure your blade is sharp and calibrated. Dull blades tear paper rather than cutting it, leaving jagged edges that are visible once lit.
- Layer Strategically: Most designs, including the popular Christmas Adventure set, consist of multiple layers (often five). Lay them out in order before applying any adhesive to visualize the depth.
- Use Proper Spacers: To create the authentic 3D look, use 3D foam pads between layers when you stick them together. These pads provide consistent elevation, allowing light to cast natural shadows and giving the reindeer and sleigh a floating appearance.
- Secure All Layers: While foam pads provide height, ensure all layers are firmly attached using glue or double-sided tape at the corners or non-visible areas to prevent shifting over time.
- Integrate Lighting: Insert an LED strip or puck light into the frame backing. Ensure the light source is concealed behind the bottom layer so only the glow illuminates the scene.
By adhering to these steps, you transform a simple digital download into a tangible work of art. The difference between a mediocre craft project and a stunning centerpiece often lies in these small details. For instance, ensuring that the foam pads are uniform prevents the layers from tilting, which could otherwise block light pockets and create uneven brightness across the image.
Maximizing Value and Versatility
The utility of a Christmas Santa Sleigh 3D Light Box extends far beyond personal home decor. For entrepreneurs and freelancers, these items represent a viable product line with high perceived value. Because the design is scalable and reproducible, you can create batches for holiday markets or online shops. However, a common misunderstanding in the commercial space is underpricing the labor involved. When selling these boxes, remember that customers are paying for the intricacy of the layering and the quality of the assembly, not just the cost of the paper. Positioning these as "handcrafted heirlooms" rather than disposable decor allows for a healthier profit margin.
Additionally, these projects make exceptional gifts. You can give it to a friend or anyone that loves Christmas, knowing that the personal effort invested adds emotional weight to the present. Unlike store-bought items that everyone else might own, a custom-assembled light box shows thoughtfulness. It is important, however, to consider the recipient's environment. If they have a traditional mantel, a warm white light might blend better, whereas a modern apartment might suit a cooler, brighter LED tone. Anticipating these preferences demonstrates a level of care that elevates the gift-giving experience.
Technical Considerations for Long-Term Satisfaction
Before finalizing your project or making a purchase decision regarding digital files, there are technical aspects to verify. First, confirm the number of layers included in the design. A standard set might include five layers, but complex scenes may require more to achieve true parallax effects. Ensure the file formats provided match your workflow; while SVG is ideal for cutting machines, having a PDF or PNG version is helpful for previewing the final look or printing stencils if you do not own a cutter.
It is also vital to note that preview images online are often enhanced for marketing purposes. The note "images are for preview purposes only" serves as a reminder that color accuracy and texture depend on your choice of materials. Do not expect the paper to glow on its own; the magic happens through the interaction of the cut layers and your chosen light source. Testing your assembly without permanent adhesion first allows you to adjust the spacing or remove unnecessary layers if the scene feels too cluttered. This "dry fit" step is a professional habit that saves materials and prevents frustration.
In conclusion, the journey to creating a Christmas Santa Sleigh 3D Light Box is rewarding when approached with knowledge and attention to detail. By avoiding common errors like improper spacing or poor material choices, and by embracing the versatility of the medium, you create more than just a decoration. You craft a beacon of holiday spirit that can illuminate your home for years to come. Whether for personal joy or commercial success, the key lies in respecting the process and understanding the potential of layered design.