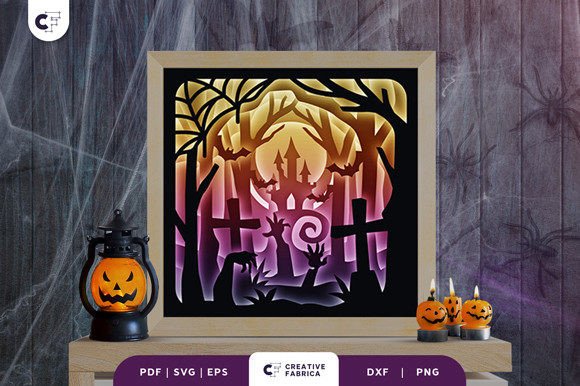
Mastering the Haunted Graveyard 3D Layered Paper Cut for Professional Seasonal Displays
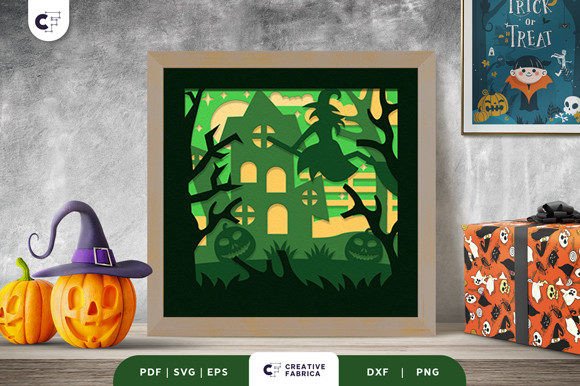
The intersection of digital design and tactile craftsmanship offers a unique opportunity for creators to produce high-impact visual assets. Among the most compelling projects in this space is the Haunted Graveyard 3D Layered Paper Cut. This is not merely a decorative item; it is a structured artistic process that transforms flat digital files into a immersive, multi-dimensional scene. For professionals ranging from small business owners crafting window displays to educators teaching spatial design, understanding the workflow behind this masterpiece is essential. The project captures the essence of the spooky season, creating a creepy scene where spiderweb sticks and a Halloween pumpkin emerge from the depths of the frame, sending shivers down the spine of anyone who views it.
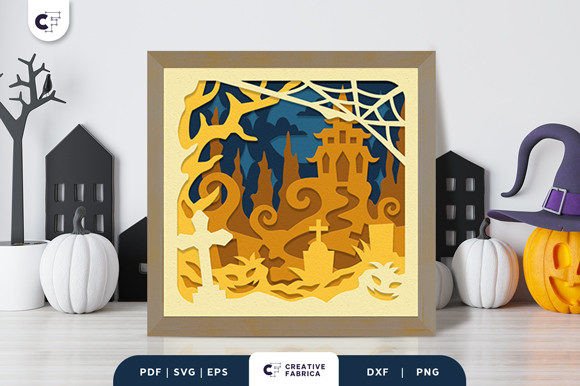
Integrating the Haunted Graveyard 3D Layered Paper Cut into your creative pipeline requires a shift from simple printing to strategic assembly. The final product is a Halloween Haunted Night Shadow Box that showcases a narrative through depth. With six distinct layers compressed into a 20.32×20.32 cm footprint, the design relies on precise spacing to achieve its atmospheric effect. Success in this endeavor depends less on raw artistic talent and more on rigorous preparation, tool compatibility, and methodical execution.
Pre-Production Planning and File Management
Before any physical cutting begins, the workflow starts with digital asset management. When you acquire this Halloween Shadow Box, you receive a comprehensive suite of file formats including SVG, PDF, EPS, PNG, and DXF. This variety ensures compatibility across different stages of production and various hardware ecosystems. For a Cricut user, the SVG format is typically the primary choice, allowing for clean vector paths that the machine can interpret without error. However, having access to EPS or DXF is crucial for professionals who might need to edit the vector nodes in software like Adobe Illustrator or CorelDRAW before sending the job to a Siser cutter.
Effective planning involves reviewing these files to understand the layer hierarchy. The design consists of six specific layers, each contributing to the overall illusion of depth. A common pitfall for beginners is neglecting to check the scale. The standard size is 20.32×20.32 cm, but if your project requires a larger storefront display or a smaller desk ornament, you must adjust the dimensions in your design software while maintaining the aspect ratio. Failure to do so can result in misaligned tabs or structural weaknesses in the final assembly.
Material selection is another critical pre-production decision. The quality of the final output is directly tied to the cardstock used. For optimal rigidity and color fidelity, it is recommended to use Encore Cardstock 80 lb cover (216 gsm). This weight provides enough substance to hold the 3D structure without bowing under its own weight, yet it remains flexible enough to adhere smoothly with tape. Thinner papers may collapse the depth effect, while heavier boards might be difficult for standard hobbyist machines to cut intricate details like the fine spiderweb sticks.
Execution: Cutting and Assembly Workflows
Once the digital files are prepared and materials sourced, the process moves to the cutting phase. Whether utilizing a Cricut or a Siser machine, the key to efficiency is organization. Load your Encore Cardstock ensuring the grain direction aligns with the structural needs of the piece, although for square shadow boxes, this is often less critical than in scroll-based projects. Run a test cut on a scrap piece of the same material to verify pressure settings. Intricate elements, such as the delicate strands of the spiderwebs or the jagged edges of the graveyard stones, require sharp blades and precise calibration to avoid tearing.
After cutting, the "weeding" process—removing excess material—demands patience and the right tools. Use fine-tipped tweezers to extract small negative spaces without distorting the surrounding paper. At this stage, lay out all six layers in order on a clean, flat surface. This visual confirmation step acts as a quality control checkpoint, ensuring no layers are missing or damaged before adhesive is applied.
The assembly phase is where the Haunted Graveyard 3D Layered Paper Cut truly comes to life. This is a process-oriented task that benefits from a systematic approach. You will need adhesives such as PVA Glue for permanent bonds on the frame and 3D Tape (foam tape) to create the spacing between layers. The thickness of the 3D tape dictates the depth of the shadow box; consistent application is vital to prevent the layers from tilting or leaning, which would break the visual perspective.
Start from the background layer and work forward. Apply the 3D tape to the designated mounting points on the rear of the second layer, then carefully align it with the first. Press firmly to secure the bond. Repeat this process for all six layers. The emergence of the Halloween pumpkin and the eerie stick figures should feel gradual and natural as you stack the pieces. If the alignment drifts even slightly by the third layer, the final image will appear skewed. Using a light table or a bright window during assembly can help ensure perfect registration of the overlapping elements.
Integration into Business and Creative Projects
For entrepreneurs and marketers, the Haunted Graveyard 3D Layered Paper Cut serves as a versatile asset beyond personal decoration. It can be integrated into retail window displays to drive foot traffic during the Halloween season. The depth of the shadow box catches light differently throughout the day, creating dynamic shadows that engage passersby more effectively than flat signage. Small business owners can produce these in batches, customizing the cardstock colors to match brand palettes while retaining the spooky theme.
Educators and workshop leaders can utilize this project to teach principles of engineering, art history, and digital fabrication. The workflow demonstrates how 2D designs translate into 3D objects, offering a tangible lesson in spatial reasoning. By guiding students through the file preparation, cutting, and assembly stages, instructors provide a complete lifecycle view of modern manufacturing.
Furthermore, content creators and bloggers can document this process to generate engaging social media content. The transformation from a flat sheet of paper to a haunting scene is visually satisfying and highly shareable. Time-lapse videos of the assembly, close-ups of the textured cardstock, and the final reveal under dramatic lighting can significantly boost engagement metrics. The note that images are for preview purposes and final product color may vary due to lighting sources is an important disclosure for creators to manage audience expectations when showcasing their own versions.
Optimizing Quality and Longevity
To ensure the longevity of your Halloween Haunted Night Shadow Box, consider the environmental factors where it will be displayed. Direct sunlight can fade the vibrant colors of the cardstock over time, so positioning the piece in indirect light or using UV-protective glass for the frame is advisable. Dust accumulation in the deep crevices of the 3D layers can be challenging to clean; therefore, sealing the back of the shadow box with a sturdy backing board is recommended to protect the internal layers.
Consistency is key when producing multiple units. If you are fulfilling orders or creating a series for an event, establish a standardized workflow. Create a jig or template for applying the 3D tape to reduce variation between units. Keep your adhesives fresh; old PVA glue or dried-out foam tape can compromise the structural integrity of the piece. By treating the creation of the Haunted Graveyard 3D Layered Paper Cut as a repeatable process rather than a one-off craft, you elevate the quality and professionalism of the final output.
Ultimately, this project allows your imagination to run wild amidst the enchanting tale spun by this stunning piece of art. Whether you are a hobbyist looking to enhance your home decor or a professional seeking to expand your product offerings, the integration of digital precision with hands-on assembly offers a rewarding experience. Get yours today in the available formats and begin the process of turning a digital concept into a physical reality that captures the spirit of the season.
For those seeking the ideal materials to execute this project, selecting the right paper stock is paramount. All cardstock featured in professional examples is typically Encore Cardstock 80 lb cover 216 gsm, chosen for its durability and finish. You can explore compatible materials to ensure your project meets the highest standards of quality. Click here to visit 12×12 Cardstock Shop to source the necessary supplies. This is a paid link at no extra cost to you, supporting the continuation of high-quality design resources.