Crafting Depth and Dread: The Ultimate Guide to the Halloween Scary Forest 3D Shadow Box
The intersection of traditional papercraft and modern digital fabrication has given rise to a captivating trend in seasonal decor: the layered shadow box. Among the most compelling designs for the autumn season is the Halloween Scary Forest 3D Shadow Box. This artistic medium transforms flat sheets of cardstock into a window looking deep into a haunting, mist-covered woodland. By utilizing multiple layers of precision-cut paper, creators can simulate depth, atmosphere, and a palpable sense of unease that flat images simply cannot achieve. Whether you are a hobbyist looking to elevate your home decor or a professional designer seeking unique assets for client projects, understanding the mechanics and aesthetic potential of this specific design is essential.
The Architecture of Fear: Understanding Layered Depth
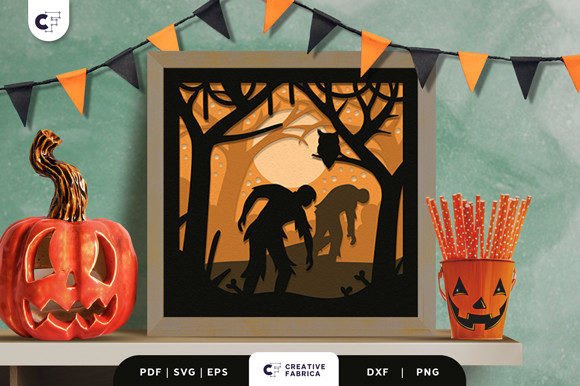
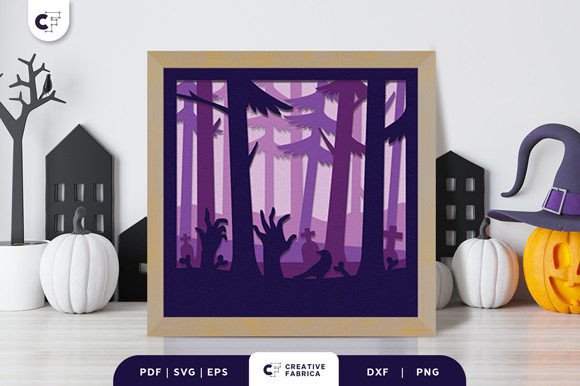
The core magic of the Scary Lush Forest 3D Paper Cut lies in its construction. Unlike a standard two-dimensional print, this design is amplified with five distinct layers of paper cuts. This multi-layered approach is not merely decorative; it is structural. Each layer serves a specific function in creating the illusion of a three-dimensional space within a confined frame. When light passes through or reflects off these staggered layers, it casts dynamic shadows that shift as the viewer moves, bringing the static image to life.
In the context of the Halloween Scary Forest 3D Shadow Box, these five layers are meticulously arranged to guide the eye from the foreground into the murky background. The frontmost layer typically features high-contrast silhouettes—perhaps twisted branches or encroaching foliage—that frame the scene. As the layers recede, the details often become softer or more obscured, mimicking the natural phenomenon of atmospheric perspective where distant objects appear fainter. This technique successfully portrays creepy woods with spooky mist, trapping the viewer in a visual loop where they feel they are peering into an infinite, dark abyss.
Material Selection and Structural Integrity
To achieve the desired rigidity and clean edges required for a professional finish, material choice is paramount. For the Halloween Scary Forest 3D Shadow Box, the industry standard often points toward heavy-weight stock. Specifically, Encore Cardstock 80 lb cover (216 gsm) is frequently recommended. This weight provides enough substance to hold its shape without warping under the tension of adhesive or the weight of subsequent layers, yet it remains thin enough to be cut with precision by standard crafting machines.
Using lighter paper may result in a flimsy structure that fails to cast the sharp, defined shadows necessary for the "creepy silhouette" effect. Conversely, paper that is too thick may be difficult to layer effectively within a standard depth frame. The 20.32×20.32 cm (approximately 8x8 inches) size specification offers a versatile canvas—large enough to display intricate details of the haunting forest but compact enough to fit on shelves, mantles, or desks without dominating the space.
Digital Assets and File Compatibility
For creators utilizing digital cutting machines, the versatility of file formats is a critical consideration. A comprehensive design package for the Halloween Scary Forest 3D Shadow Box should provide flexibility across various software ecosystems. Professionals and hobbyists alike benefit from receiving the design in multiple formats:
- SVG (Scalable Vector Graphics): Ideal for users of Cricut, Silhouette, and other vector-based cutting software. SVG files allow for infinite scaling without loss of quality, ensuring that the intricate details of the forest twigs and ghostly figures remain crisp regardless of the final project size.
- PDF (Portable Document Format): Perfect for those who prefer to print templates manually or use laser cutters that accept rasterized vector data. PDFs ensure that the layout and spacing of the five layers remain consistent.
- EPS (Encapsulated PostScript): A standard for professional graphic design software like Adobe Illustrator, allowing advanced users to modify anchor points and customize the silhouette shapes before cutting.
- PNG (Portable Network Graphics): Useful for previewing the design, creating marketing materials, or using with CNC machines that rely on image tracing.
- DXF (Drawing Exchange Format): Widely used in CAD software and industrial laser cutting, ensuring compatibility with high-end fabrication tools.
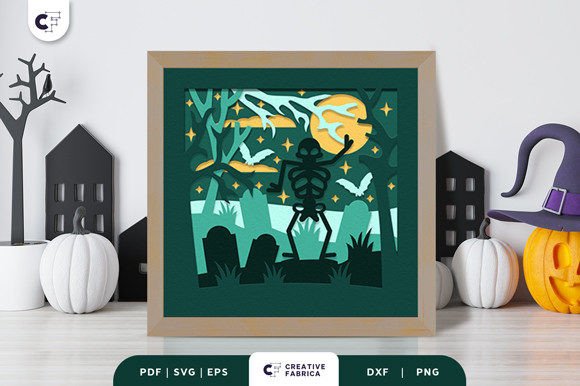
It is important to note that while digital previews provide a clear idea of the final outcome, the physical product's appearance can vary. Lighting sources play a significant role in how the shadows are cast. A warm, dim light will enhance the eerie, orange-hued glow typical of Halloween, while cool, white LED lighting might emphasize the stark contrast of the black silhouettes against the background. Furthermore, the color of the cardstock itself influences the mood; deep purples, midnight blues, or classic blacks each impart a different emotional resonance to the Scary Lush Forest.
Step-by-Step Assembly Workflow
Constructing a Halloween Scary Forest 3D Shadow Box requires patience and precision. The process transforms a collection of flat files into a tangible work of art. To begin, one must prepare all the necessary tools. Beyond the digital files and cutting machine, essential supplies include double-sided tape or acid-free glue, a deep-set frame or shadow box enclosure, and the prepared file cuts.
- Preparation and Cutting: Load your chosen cardstock into the cutting machine. Ensure the blade is sharp to prevent tearing, which can ruin the delicate edges of the forest silhouettes. Cut all five layers according to the provided digital template. It is advisable to label each layer immediately after cutting to avoid confusion during assembly.
- Testing the Fit: Before applying any adhesive, dry-fit the layers into the frame. Stack them one by one to verify the spacing and alignment. This step allows you to adjust the distance between layers if your frame depth differs from the standard recommendation.
- Adhesion Strategy: Begin with the background layer (Layer 5). Apply small dots of glue or strips of double-sided tape to the corners and key structural points. Avoid excessive glue, which can seep out and create visible bumps or discoloration.
- Layering Process: Carefully place Layer 4 onto Layer 5, aligning the registration marks. Press gently to secure. Repeat this process, working forward to Layer 1. The goal is to maintain uniform spacing between each sheet to maximize the 3D effect.
- Final Framing: Once all layers are stacked and the glue has set, secure the entire assembly into the frame. Ensure the glass or acrylic front is clean and free of dust before sealing the unit.
Balancing Aesthetics and Atmosphere
The true challenge in creating a successful Halloween Scary Forest 3D Shadow Box is balancing the fear factor with aesthetics. A design that is too chaotic may look messy rather than spooky, while one that is too sparse may lack impact. The Scary Lush Forest design addresses this by incorporating a "creepy silhouette that you can't make out." This ambiguity is a powerful psychological tool. Is the shape in the distance a twisted twig, a lurking person, or a ghost? By leaving certain elements open to interpretation, the artwork engages the viewer's imagination, generating a sense of fear and unease that is far more effective than explicit gore.
Creators should consider the placement of their finished shadow box. In a dimly lit hallway, the piece can serve as a subtle jump-scare element. In a well-lit living room, it acts as a sophisticated conversation piece that highlights the intricacy of papercraft art. The interplay of light and shadow is dynamic; as the sun moves across the room or as indoor lighting changes, the shadows within the box shift, altering the narrative of the forest scene throughout the day.
Applications Across Industries and Hobbies
The utility of the Halloween Scary Forest 3D Shadow Box extends beyond simple home decoration. For educators, this project serves as an excellent STEAM (Science, Technology, Engineering, Arts, and Mathematics) activity. It teaches students about geometry, spatial reasoning, and the physics of light and shadow. Researchers studying visual perception might also find interest in how layered 2D planes trick the brain into perceiving 3D volume.
For business owners and retail designers, these shadow boxes offer a cost-effective yet high-impact solution for seasonal window displays. Their compact size allows for dense arrangement, creating a "forest" of shadow boxes that draws customers in. Content creators and influencers can utilize the assembly process for engaging tutorial videos, capitalizing on the satisfying nature of ASMR-style crafting content. The availability of diverse file formats ensures that whether one is using a desktop die-cutter or an industrial laser, the design remains accessible.
Ultimately, the Halloween Scary Forest 3D Shadow Box represents a fusion of digital convenience and tactile artistry. It allows individuals to bring a professional-grade haunted aesthetic into their personal spaces with relative ease. By following the structured workflow of cutting, stacking, and framing, and by paying close attention to material quality and lighting conditions, anyone can create a mesmerizing portal into a spooky, lush forest. The result is a piece of art that does more than decorate; it evokes emotion, tells a story, and captures the very essence of the Halloween spirit through the elegant medium of paper.