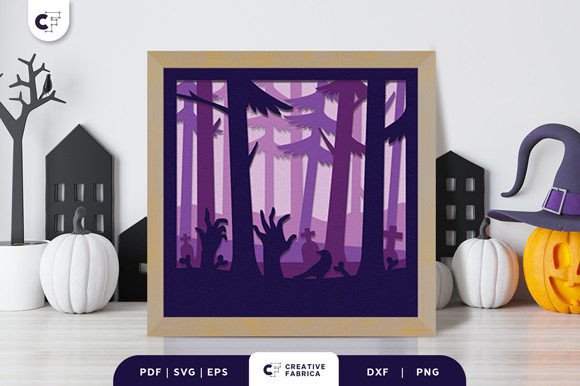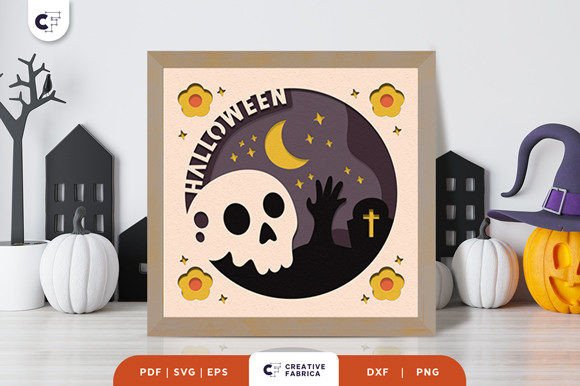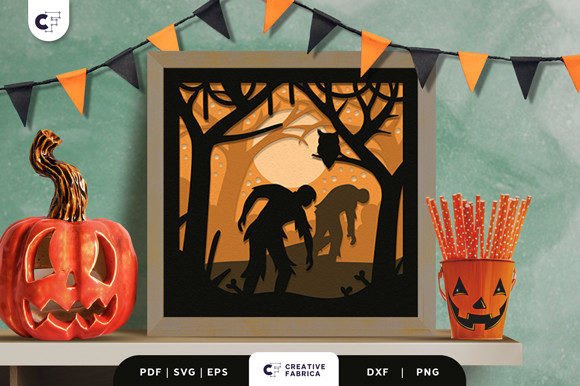
Mastering the Halloween Scary Forest 3D Paper Cut for Stunning Shadow Boxes
There is a unique thrill in transforming flat sheets of paper into a depth-filled scene that seems to breathe with life. A subtly scary shadow box provides an opportunity for artistic expression that goes beyond standard decorations. When you engage with a Halloween Scary Forest 3D Paper Cut, you are not just hanging a poster; you are building a diorama that brings up the rising of the dead theme in a tangible way. Imagine zombies emerging from the mist on a scary night, layered meticulously to create an eerie feeling in your space. However, while the concept sounds simple, the execution often trips up even experienced crafters. To ensure your final composition evokes conversation rather than frustration, it is essential to approach the project with a clear understanding of materials, layering techniques, and design selection.
Choosing the Right Design and Format
The first step in creating a successful shadow box is selecting a design that matches your skill level and equipment capabilities. Many beginners make the mistake of downloading complex files without verifying the format compatibility. You will typically receive these designs in formats such as SVG, PDF, EPS, PNG, and DXF. If you are using a digital cutting machine like a Cricut or Silhouette, an SVG or DXF file is usually ideal because it preserves cut lines as vectors. Conversely, if you plan to cut by hand, a high-resolution PDF or PNG might be more practical for tracing.
A common oversight occurs when creators ignore the number of layers specified in the design description. For a standard Halloween Scary Forest 3D Paper Cut, you might encounter projects with five distinct layers. While this offers excellent depth, it also requires precise spacing. If you choose a design with too many layers for the depth of your frame, the paper will crush against the glass, ruining the 3D effect. Always check the dimensions; a size of 20.32×20.32 cm is popular for standard frames, but ensure your hollow box can accommodate this footprint plus the necessary depth for the layers to float freely.
Material Selection and Weight Matters
Perhaps the most critical factor in the quality of your shadow box is the paper stock you choose. A frequent error among hobbyists is using standard printer paper or lightweight cardstock. These materials lack the structural integrity to hold their shape between layers, leading to sagging and a loss of the intended spooky atmosphere. For professional results, all cardstock featured in high-quality projects should be around 80 lb cover (216 gsm), such as Encore Cardstock. This weight is heavy enough to stand rigidly yet thin enough to be cut cleanly by most machines.
Color consistency is another area where mistakes happen. Note that images online are for preview purposes only, and the final product color may vary slightly due to lighting sources and the specific paper brand you purchase. If you are aiming for a specific mood—perhaps a moonlit blue or a blood-red accent—buy all your paper from the same batch to avoid subtle shade variations that can break the immersion of the scene. Darker colors tend to hide minor cutting imperfections better than light colors, which is a useful tip if you are still refining your machine settings.
Precision in Cutting and Assembly
Once you have your files and materials, the cutting process begins. It is tempting to rush through this stage, but precision here dictates the success of the assembly. When cutting the file papers with a cutting machine, ensure your blade is sharp and calibrated for the 80 lb weight. Dull blades cause frayed edges, which look messy when layered. If you notice small details, like tree branches or zombie fingers, are not cutting through completely, do not force them out. Instead, adjust your pressure settings and run a second pass. Forcing pieces out can tear the delicate connections that hold the intricate parts of the Halloween Scary Forest 3D Paper Cut together.
Assembly is where the magic happens, but it is also where patience is tested. The instruction to "attach template adhesive one by one" sounds straightforward, but the technique matters. Using thick foam tape or specialized spacer dots is crucial to create the illusion of depth. A common mistake is placing spacers randomly or using adhesive that is too thin, which flattens the perspective. To avoid this, place spacers strategically at the corners and along the structural lines of the design. Ensure that the adhesive does not peek out from behind the layers, as visible glue strips can distract from the eerie vibe you are trying to cultivate.
Framing and Final Presentation
The final step is to frame the design in a hollow box. Many crafters purchase deep-box frames only to realize the back panel is too close to the front glass once all five layers are installed. Before committing to a frame, do a dry fit of your stacked layers. There should be a slight gap between the foremost layer and the glass to prevent condensation or static from clinging the paper to the surface. If the fit is too tight, consider removing the original backing of the frame and constructing a deeper box using wood strips or additional frame extenders.
Lighting plays a significant role in how your Halloween Scary Forest 3D Paper Cut is perceived. Shadows are the essence of this art form. Placing a small LED strip at the top or bottom of the shadow box can dramatically enhance the details, making the zombies appear to emerge from the darkness. However, be cautious with heat-generating bulbs, as they can warp the paper over time. Stick to cool-running LEDs to preserve the integrity of your 216 gsm cardstock.
Creating this decoration is easy if you respect the process and pay attention to these details. Whether you are a small business owner selling handmade decor, an educator teaching paper arts, or a homeowner looking to add creepy vibes to your hallway, the result is worth the effort. All the detail will look amazing after all the layers have been done correctly. By avoiding the pitfalls of poor material choice, incorrect formatting, and hasty assembly, you ensure that your Halloween Jungle 3D Shadow Box becomes a centerpiece that captivates viewers. Take your time, verify your measurements, and enjoy the process of bringing a scary night to life within a frame.